The "High-Low" Guide to Thunderbird Park: Resort Perks Without the Resort Price Tag
How I spent $184 for 2 nights instead of $746 – and still felt like I was glamping.
Mum's verdict
Kids Fun
Price
Let me tell you a secret: you don’t need to drop $373 per night on a glamping tent to enjoy the luxury experience at Thunderbird Park. With a bit of planning and some clever hacks, my family enjoyed all the resort perks while camping in an unpowered site for a fraction of the cost.
Here’s how we mixed budget accommodation with premium activities at Tamborine Mountain’s Thunderbird Park (now part of Tamborine Mountain Glades) – and why it might be the smartest camping decision you make this year.
The Numbers: What We Actually Spent
Camping Fees (2 nights in an unpowered site): $184 total
$72 per night for our 8-10 person tent site (school holiday rate)
$10 per additional guest
Total saved vs. glamping tent: $562 (glamping starts at $373/night)
Activities:
Crystal panning: $20 per bag
Fossicking: $67 total (1 adult at $29, 2 children at $19 each)
The best part? We had access to everything the glamping guests did: brand-new ensuite amenities, the gorgeous Cedar Creek, all the activities, and spacious sites with individual fire pits.
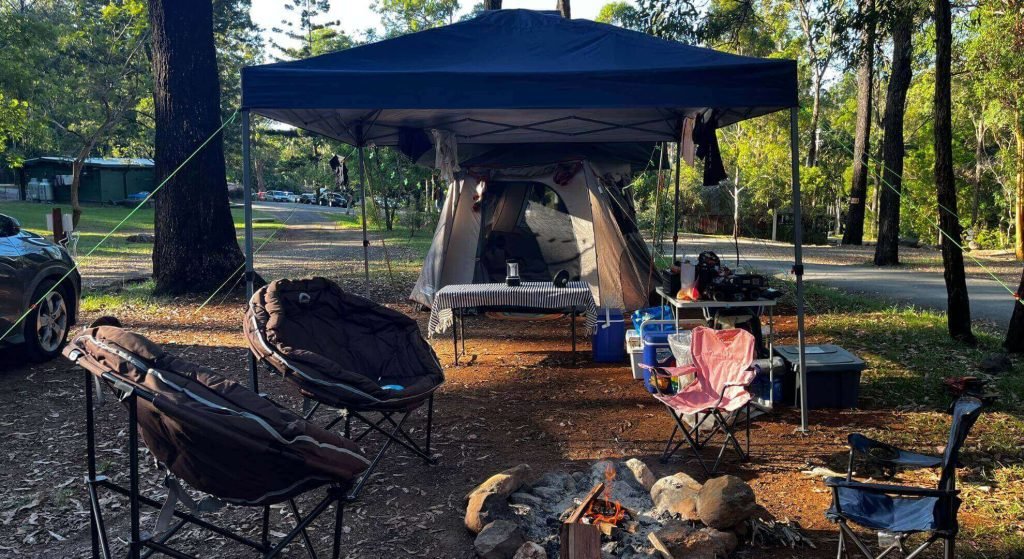
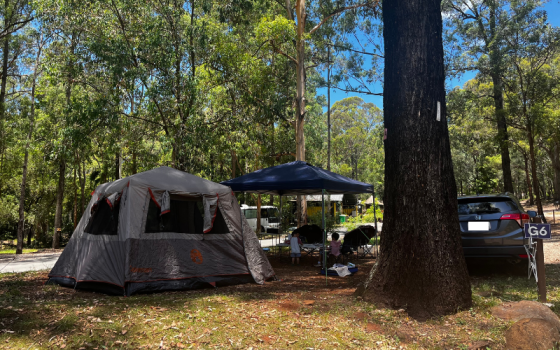
Our campsite G6 was large enough for our tent, a gazebo, and our car parked right beside us – with plenty of trees providing natural privacy between sites.
The Camp Kitchen & Amenities: Budget Camping Meets Luxury
As a mum of two boys, I’ll be honest – I wasn’t about to cook over a campfire every single meal. The camp kitchen needed to deliver, and I’m happy to report it did. It was clean, functional, and super accessible.
The Game Changers:
- Clean, functional, and super accessible from our site
- Two kitchen facilities equipped with microwaves, BBQ grills, kettles, and sinks
- Dish washing liquid and sponges provided (hallelujah!)
- Free washing machine and coin-operated dryer
This setup was a game-changer for our unpowered site. Having a microwave meant I could heat up leftovers for the kids without fussing over the fire pit every time someone got hungry.
But the real highlight? The brand-new ensuite amenities.
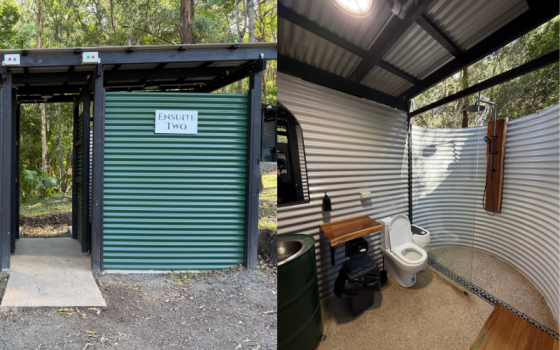
Here’s where Thunderbird Park really shines. We tried their brand-new ensuite amenities, and honestly, this alone elevated our budget camping experience into something special.
The ensuite breakdown:
- Individual toilet, sink, and shower in one private space
- Big enough for our whole family to use together (parents of young kids, you know how valuable this is)
- Spacious and clean
- Makes morning routines with children SO much easier
Beyond the ensuites, the regular facilities were equally impressive. The women’s toilet even had a nappy change area. Since we visited during the week, the sites weren’t crowded – we barely ran into anyone during toilet or shower runs.
The individual fire pit at our site was easy to use. We grabbed firewood from a local shop, though the park sells bags for $25 if you need them.
🚿 AMENITIES QUICK LOOK
Toilet Style: Private Ensuites (Shower + Toilet + Sink)
Kitchen: 2x Kitchens with Microwaves, Kettles, BBQ Grills.
Mum Win: Women’s toilets have nappy change areas; Dish soap provided.
"The 'Glamp' Factor: Making a Basic Site Feel Luxe"
When you think glamping, you probably picture canvas tents with fairy lights, plush bedding, and Instagram-worthy aesthetics. You’re paying for that look and comfort, and while it’s tempting (and sometimes worth it), I couldn’t justify the cost when a little effort and preparation can create our own budget glamping experience.
Here is exactly how we elevated our basic campsite from “roughing it” to “relaxing”:
If you’re building your first setup, our camping gear for beginners guide walks through the essentials.
Bring Your Bedding (Properly)
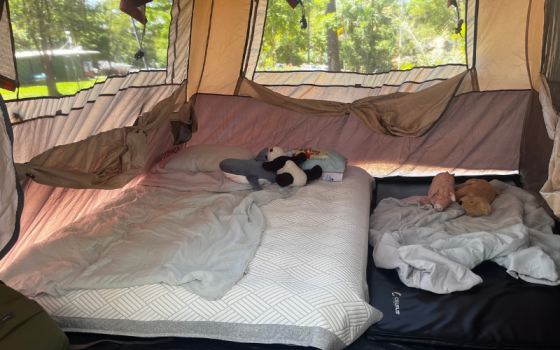
Forget sleeping bags that look (and feel) like you’re camping. To get that resort feel, we brought our own bedding from home.
The Secret Weapon: A cooling mattress cover with elastics on all four corners. This was clutch for the warm Tamborine nights—it stops that sticky “plastic mattress” feeling.
The Comfort: We packed our own pillows and a proper Queen-size duvet cover.
The Result: This made our tent look instantly tidier and feel like sleeping in our own bed—except better, because we were under the stars.
Fairy Lights Are Magic
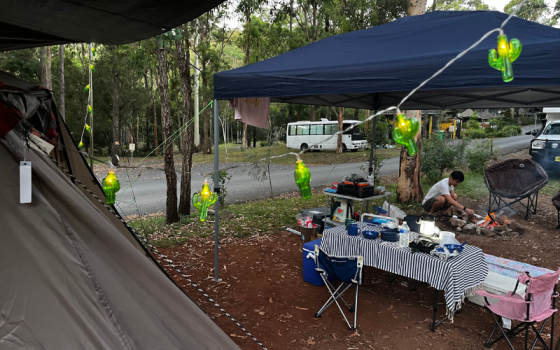
I picked up some cactus-shaped fairy lights from Kmart for just $3 per box. I attached them to the tent entrance, and boom—instant glamp vibes.
Parent Win: Beyond looking cute, they served a practical purpose. They acted as a perfect night-light, helping us spot our tent easily during those inevitable nighttime toilet runs with the kids.
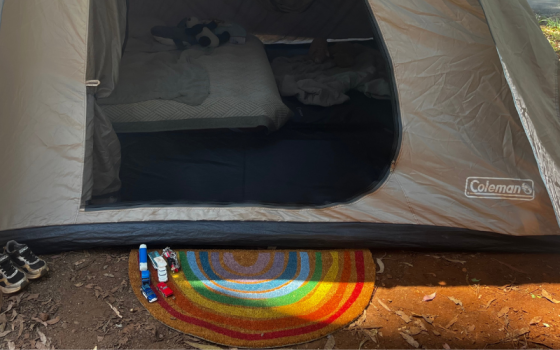
The Outdoor Doormat
If you hate dust and leaves tracking into your tent (guilty!), this is your solution. I brought our outdoor doormat from home and placed it right at the zipper entrance.
Why it works: The kids could stand on it while taking shoes off or coming in and out. It kept our sleeping space significantly cleaner and sand-free.
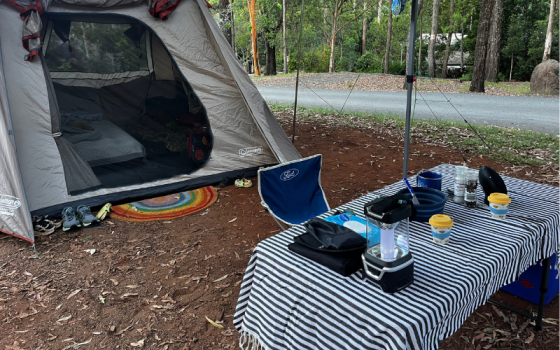
The Table Cloth Upgrade
Never underestimate the power of a table cloth. Throw one over your boring (and often dirty) plastic camping table, and suddenly your campsite meals have a whole different vibe. It’s a tiny touch that makes breakfast feel like a cafe experience rather than a mess hall.
⛺ Your DIY Glamp Kit Checklist"
- Bedding: Cooling mattress protector + Real Doona (No sleeping bags!)
- Lighting: Battery-operated fairy lights (Kmart/Bunnings).
- Cleanliness: Sturdy outdoor doormat for the entrance.
- Dining: Patterned tablecloth + clips to hold it down.
The Activities: Worth Every Dollar?
With the money we saved on accommodation, we splurged a little on activities. Here’s the honest breakdown of what worked (and what to know before you go):
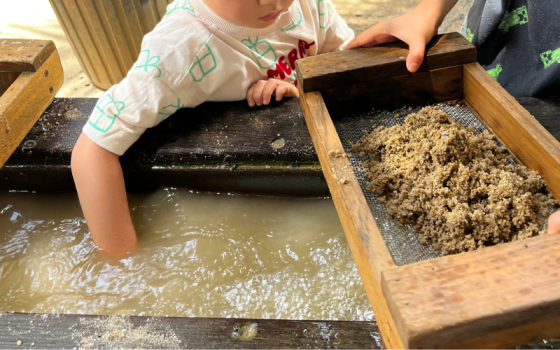
This was hands-down the easiest activity, and even my two-year-old toddler loved it. You get a full bag of crystals mixed with sand, bring it to the little panning area, and start sluicing it under water. As the sand washes through, beautiful colored crystals are left behind – and there are plenty of them.
My kids loved picking up each discovery. It’s a simple but mindful activity that kept everyone engaged without being too challenging for little ones. Plus, you get lovely souvenirs to take home that the kids actually collected themselves.
💎 FAST FACTS: CRYSTAL PANNING
Cost: $20 per bag (shareable).
Best For: Toddlers & young kids.
Why do it: Instant gratification, zero frustration, great souvenirs.
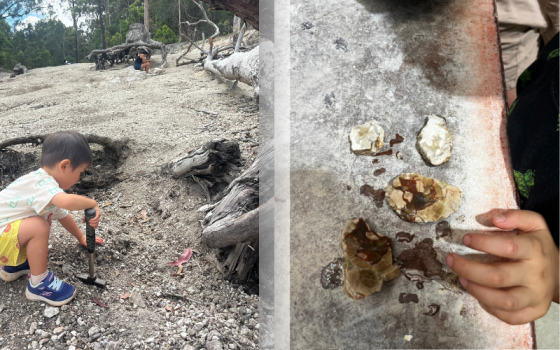
This was the surprise hit – and a real mining site experience. You pay for entry, and each participant gets a bucket that holds up to 5kg of rocks. The site is about 500m walk from the ticket area along a gravel road (not pram-friendly, so plan accordingly).
Once you’ve collected your rocks, bring them to the station where staff do rock sorting on a big white table. They’ll help you identify which rocks might be worth cutting open. The cutting starts at $5-6 for a table tennis ball-sized rock, and when we opened ours, the colors inside were absolutely beautiful.
The reality check for families:
Go early (8-9am). The area is big and exposed to full sun.
- There are two levels: Level 1 is fairly flat, Level 2 requires going past a steep hill.
My two-year-old didn’t love it – he was just digging without understanding what we were looking for.
Despite the toddler challenges, the older kids and adults had a blast, and those cut-open rocks are treasures we’ll keep forever.
⛏️ FAST FACTS: FOSSICKING
Cost: ~$67 (Family of 4 approx).
Best For: Ages 5+ (Toddlers may find it boring/hot).
Top Tips: Go early to beat the heat; bring snacks; pack a picnic mat for little ones to sit on.
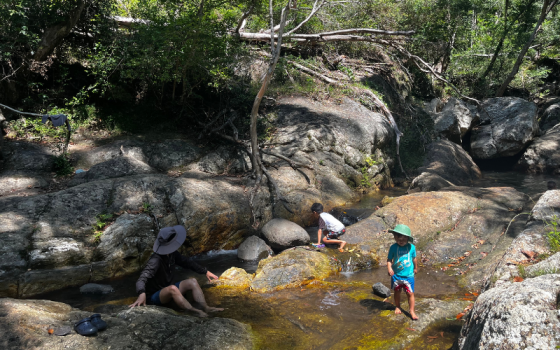
The walk to the rockpool is easy at first – you pass through the campsite and glamping area. Then you hit a rocky section that can be challenging for toddlers. We had to carry our two-year-old down to the creek.
The rockpool itself is gorgeous. The deep area is deep enough for adults to jump off the cliff, which my husband and older son loved. We didn’t stay in that deep section much with the toddler, obviously. What the kids actually loved was playing in the shallower creek area, dropping leaves in the water and racing them downstream.
🌊 FAST FACTS: ROCKPOOLS
Cost: Free!
Walk: 5-10 mins (Easy start, steep/rocky end).
Warning: The walk back UP is tricky with tired toddlers—save some energy!
Bring: Stone fruit or easy snacks to keep energy up.
The Activity Verdict
These activities are what make Thunderbird Park special. Yes, they add to your overall cost, but they’re the “high” in the high-low strategy – splurge here while saving on accommodation. The memories of finding crystals and cracking open thunder eggs to reveal hidden colors? Those are worth every dollar.
Just remember: not every activity will work perfectly for every age. Crystal panning is universal, fossicking is better for older kids (or if you bring entertainment for toddlers), and the rockpool is magical but requires some physical management with little ones.
Location Perks: What Makes Thunderbird Park Special
Situated in Tamborine Mountain Glades, the campsite is surrounded by lush rainforests, pristine creeks (hello, Cedar Creek!), and starry nights that make you remember why you love camping in the first place.
Our site G6 was the closest to the entrance and activity areas, making everything incredibly accessible. We also got to peek at the nearby glamping sites, which confirmed we made the right choice – they looked lovely, but we weren’t missing out on anything substantial.
The Key Takeaway
You absolutely don’t need a cabin or glamping tent to enjoy the resort perks at Thunderbird Park. With an unpowered site, some thoughtful preparation, and a willingness to add a few personal touches, you can create a comfortable, even luxurious camping experience for a fraction of the price.
Bottom line: Thunderbird Park’s unpowered sites give you access to all the good stuff – pristine nature, excellent amenities, family-friendly activities, and spacious sites with privacy. Bring your own “glamp” touches, and you’ll wonder why you ever considered paying triple for a canvas tent.